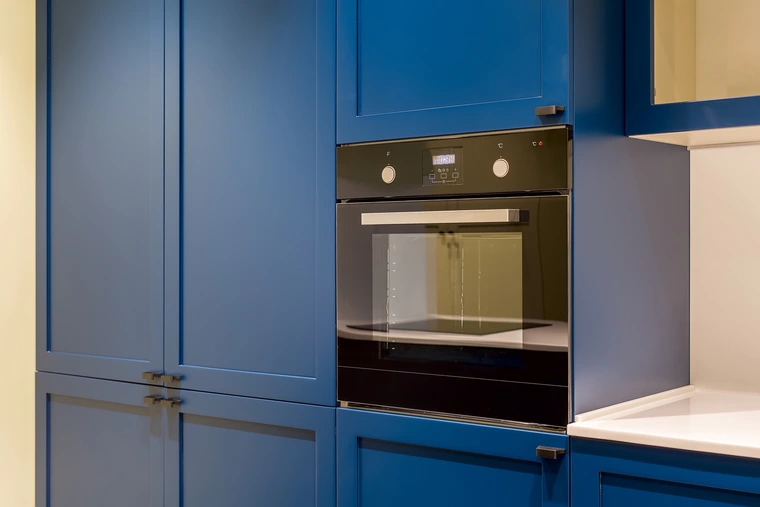
How to install and connect the oven

Is it worth installing the oven yourself or is it better to trust the experts? This is the question that torments the home master. This material will show that a beginner can cope with installing an oven. It is important to pay attention to the fact that we will talk about installing and connecting an electric oven, since connecting gas ovens is the domain of specialized organizations that have permission to carry out work of this kind.
Preliminary preparation
The installation of an oven and other built-in kitchen appliances is the final stage in the design of the working area of the kitchen. At this stage, the user will be required to:
- A clear understanding of the installation site of the oven. There is a possibility of the classic arrangement of kitchen appliances (the oven is located below the level of the countertop) or the location of the oven at the chest level, which is more rational from the point of view of ergonomics. This solution will be appreciated by those who often use the oven.
- Knowledge of the oven model. You need to decide on the model before starting the design of furniture, since the understanding of its geometric dimensions for calculating the embedding niche depends on this.
- Indication of the optimal location for the electrical outlet for connecting the oven. This will determine the location of the holes on the back walls of the furniture for the power cable and access to the outlet.
When ordering furniture, it will be useful to inquire about the technical characteristics of the materials from which it will be made. It must be a heat-resistant material capable of withstanding thermal loads up to 100 ° C. The use of PVC materials and materials with reduced heat resistance is not allowed.
Electrical connection
The ideal case when connecting the oven to electricity is when the socket is in the immediate vicinity of the installation site and the length of the complete cable is enough to connect the oven to the network. Otherwise, the supply wire will need to be replaced.
If the design of the oven allows access to the terminal box without breaking the warranty seals, then the cable can be replaced by yourself, otherwise you must contact the service center.
To replace the cable, you need to remove the back panel of the oven or simply open the cover of the terminal box.
Loosen the screws securing the conductors and remove the electrical cable.
Install a cable of the same length instead of the removed cable.
Not always in the arsenal of a home craftsman there is a tool for measuring the cross-section of conductors, and this parameter is very important to ensure the safe operation of an electric oven! In order not to be mistaken and purchase a cable with the required conductor cross-section, you should use the following
Preparation for connecting (stripping) a new cable is performed as follows:the sheath of a three-wire cable is removed, approximately 4–5 cm long;
- conductors are stripped of insulation and connected to the appropriate contacts. Blue wire to terminal "L", brown to "N", yellow-green to ground;
- the ground wire (yellow-green), as a rule, should be a couple of centimeters longer for a more convenient connection to the ground pin.
Important! The electrical plug of the cable and the socket for connecting an oven with a power of 3–3.5 kW must be designed to carry a current of at least 16 A.
As for the line itself that feeds the outlet, you shouldn't worry too much here. The current standards do not allow hidden installation in walls of copper conductors with a cross section below 2.5 mm2. Therefore, it should be borne in mind that if other consumers are connected to the supply line to the oven, then it is important not to exceed the current load. Do not provoke the operation of automatic machines or the "combustion" of plugs.
How to correctly calculate the power consumption of kitchen appliances is described in detail in the article .
Installing the oven
The built-in oven is installed in a pre-prepared niche for it. For normal air circulation, necessary to remove the heat emitted by the outer panels of the cabinet, a special ventilation hole must be made in the rear wall of the niche. Its size and location are indicated in the instruction manual.
When installing in a niche, it is important to understand that it is highly undesirable to allow direct contact of the oven walls with the elements of the furniture structure. An air gap of at least 4–5 mm must always be maintained between them. To ensure normal air circulation inside the niche, the oven is installed on small legs, which can be made unregulated, in the form of stampings on the bottom or in the form of adjusting screws screwed into special holes.
The leveling feet have three important functions:
- They promote the flow of cold air into the niche, thereby ensuring heat removal from the outer walls of the oven.
- Prevents direct contact between the bottom of the oven and the bottom of the niche.
- Provide the ability to adjust the upper and lower gaps between the oven and furniture fronts.
The installation itself is fairly straightforward. First, an electric cable is inserted into a pre-prepared hole, and then, with the additional muscular strength of a strong assistant, the oven is installed in a niche.
Since the internal dimensions of the niche are larger than the dimensions of the oven, it is always possible to set equal gaps around the entire perimeter of the oven front panel.
https://turismolasiberia.juntaex.es/web/pdf-dumps/microsoft-mb-330-exam-dumps
https://turismolasiberia.juntaex.es/web/pdf-dumps/palo-alto-networks-pccse-exam-dumps
https://turismolasiberia.juntaex.es/web/pdf-dumps/oracle-1z0-1074-20-exam-dumps

6 Effects of COVID19 on Students’ Mental Health
- COVID 19 is still a pandemic globally. But, with jobs and businesses, students are also disturbed mentally
.jpg)
Get all CA Final chapterwise test series with answers
- Most of the people are utilizing this unique one and that they are all score more during this exam.

What are the Study of Courses in Lovely Professional University?
- The study also identified as correspondence programs are a branch of curriculum that relies on interactive skills

How to Score 7+ in Your IELTS Exam?
- get a 7+ in the IELTS examination, then this article might help you somehow. Here are some best ways how to score 7+ in your IELTS exam?